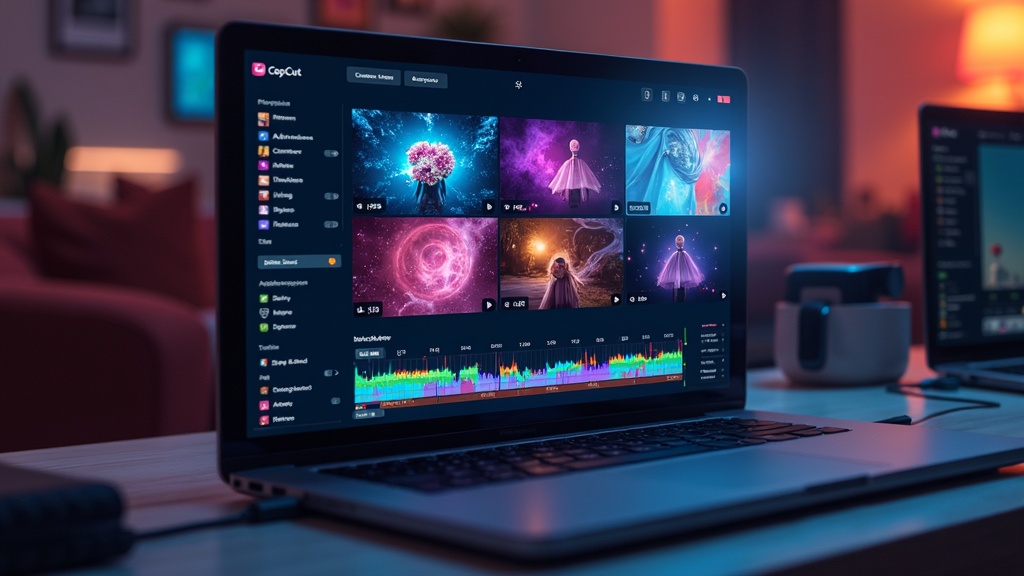
If you’re just getting started in video editing and want something accessible but loaded with eye-catching tools, CapCut is an app that’s pretty hard to beat. It’s totally free, friendly to both absolute beginners and those looking to step up their editing game, and works great on mobile and desktop. CapCut is made by the people behind TikTok (Bytedance), so it’s no surprise it has become super popular for making short, snappy, shareable videos. But CapCut isn’t just tied to TikTok—it’s got all the basics and a bunch of extras you can use for any video project.

Here’s a quick look at my take on CapCut for beginners, before we jump into the details:
App Name: CapCut
Platforms: iOS, Android, Windows, macOS, Web
Pricing: Free (with optional inapp purchases, and some paid assets)
Founded by: Bytedance (creators of TikTok)
User base: Millions globally, trending especially among social media creators
Overall Rating: 4.8/5
App Store/Google Play Rating: 4.7/5 (as of 2024)
Editing Features: 5/5 (for the beginner to intermediate level)
Export Options: 5/5
Templates & Effects: 4.8/5
Ease of Use: 5/5
Free to Use: Yes. Download CapCut and start editing right away. No sign-up needed for the basics. Whether you just want to experiment or fully jump in, CapCut makes the process easy and approachable.
CapCut stands out because it removes the usual barriers for new editors: zero cost, minimal learning curve, and a toolkit that’s powerful, flexible, and loaded with the kind of trending effects people actually want to use. It’s designed so you don’t need techy experience to create something that looks sharp and modern, whether that’s a TikTok, YouTube short, Instagram reel, or even a longer video for school or work.
So, whether you want to do quick edits or build more complex projects, CapCut probably has what you need. You can get going on your phone or computer in just a few minutes, and switching between devices is a cinch thanks to the syncing feature once you’re logged in.
Meet CapCut: The Basics and Background
My first experience with CapCut was when a friend showed me how fast you could add music and effects to a raw clip from your phone and instantly upload it to social media. I was blown away. CapCut began as a simple mobile app called “Viamaker” but was rebranded and updated by Bytedance in 2020. Since then, it’s become the goto editing app for TikTok creators, and recently even more people are using it for everything from vlogs to explainer videos.
As of now, CapCut is available on pretty much every platform that matters: there’s a strong, easy to use app for iOS and Android, a solid web editor, and desktop versions for Windows and Mac. Updates come often, which keeps it fresh. Most tools are free, though there’s some watermarking and a few premium graphics or effects tucked behind a paywall. For most beginners, that’s totally optional.
I find CapCut’s approach to user experience is all about simplicity. The layout is clean, buttons are labeled in plain English (and lots of other languages too), and launching the app drops you right into a project area. There’s no fuss with setup. Editing timelines, preview windows, and effects menus are where you’d expect, so even if you’ve never used video editing software, you won’t be lost for long.
CapCut is really good at helping anyone, especially those who want to make shareable content, tell their story or message quickly and with style.
Key CapCut Features for Beginners
I’ve tried a bunch of video editors, but CapCut’s feature set for beginners is super friendly. Here are the standout features that make CapCut worth checking out when you’re just starting:
- Easy Drag and Drop Timeline: Moving clips, images, text, and effects around is simple—just tap, hold, and drag. No clunky menus or confusing steps to figure out.
- Auto Captions & Speech to Text: CapCut has one of the fastest, most accurate auto-captioning tools out there. Tap one button, and you’ve got subtitles for any video—huge if you’re making content for social or need accessibility.
- Free Music & Sound FX: The builtin music and effects library saves you hunting for royaltyfree options. Everything’s licensed for personal and even commercial use on social platforms.
- Templates Galore: If you’re not sure how to start, CapCut’s premade templates let you swap in your own clips and text. It’s like having a shortcut to an eye-catching finished video style.
- Fun Transitions & Effects: More than just basic fades, CapCut has trending effects like 3D zoom, glitch, split screen, and motion blur. They’re just a tap away.
- Chroma Key (Green Screen): Want to change the background in your video? CapCut’s green screen tool is super easy for beginners. You can transport your subject anywhere with a few taps.
- Stickers, Filters, and Text Animation: Loads of options to make your video pop without needing to know anything about design.
- One-Tap Export and Share: When your video’s done, hit export and it’s instantly ready to drop on TikTok, YouTube, Instagram, or save to your camera roll. You pick the resolution and aspect ratio; sharing is a breeze.
You can do a lot without ever touching the advanced settings. CapCut is really smart about making those extras available, but never forcing you to use them before you’re ready.
Core Editing Workflow: Step-by-Step for First-Time Users
When I walked through my first project in CapCut, I loved how the steps follow a super logical flow. Here’s a basic starter guide that makes video editing feel pretty easy:
- Start a New Project: From the main menu, tap “New Project,” then pick your video clips or photos. You can mix and match and even pull stuff in from your cloud drive.
- Arrange Your Clips: Drag clips into the order you want on the timeline. Use split and trim tools to cut out parts you don’t need; super intuitive for anyone familiar with photo editing.
- Add Music or Sound Effects: Tap the audio icon to browse CapCut’s music and sound effects, or import your own tracks. Lining up a song is as simple as dragging it onto your timeline.
- Insert Text, Captions, or Stickers: Use the “Text” and “Stickers” buttons to place captions, speech bubbles, or graphics anywhere you want. Adjust fonts, colors, and motion effects just by tapping style options.
- Apply Filters & Adjust Looks: The “Filter” and “Adjust” menus let you instantly change the video’s mood. You get options for color grading, retro vibes, split screens, glitch, light leaks, and a bunch more.
- Add Transitions: Want smooth switches between clips? Select the spot between two clips, and choose from CapCut’s included transition effects (there are a lot!).
- Preview As You Go: The preview window keeps things realtime. Watch each change as you add it; undo is always one tap if something isn’t right.
- Export & Share: Once you’re happy, tap “Export.” CapCut gives you presets for TikTok, Instagram, YouTube, and the full range of resolutions and formats. No extra hoops to jump through—just pick and go.
This basic workflow covers 99% of what most beginners want. The timeline makes it easy to experiment and try again until things feel just right. You’ll rarely feel stuck or confused since every key tool is right up front.
Learning the Timeline: Split, Trim, and Arrange Clips
For brand new editors, getting comfortable with the timeline is really helpful. I always tell people to spend five minutes dragging clips and learning to split and trim, because this is the core of video editing.
- Splitting: Tap a clip on the timeline, scroll to the “Split” tool, and cut it wherever your playhead is. Perfect if you want to remove a mistake, camera wobble, or just shorten a moment.
- Trimming: Tap the beginning or end of a clip and drag the handles to trim. You’ll see little time indicators so you can get it down to the exact second.
- Moving Clips: Hold and drag any clip to rearrange the order on the timeline. This is huge for storytelling—putting scenes where they make sense.
- Magnification: Use pinch to zoom on the timeline to get closer and make more detailed edits.
CapCut’s timeline makes learning these moves feel less intimidating. If you’re starting out, just open a practice project and try things out. Nothing’s permanent until you export!
Adding Music and Audio: The CapCut Sound Library
Good audio takes a video from “meh” to “wow.” CapCut comes loaded with its own sound library—music tracks for every mood, simple sound effects (think whooshes, beats, beeps), and even meme-worthy sounds if you want to go for laughs.
- To add: Click the “Audio” tab, browse or search, listen, and tap the ones you like. Drag and drop them to your timeline. You can fade audio in or out, turn the volume up or down, and trim it the same way as video clips. This all works seamlessly, so even firsttimers can sound like pros.
- Add Your Own: Got your own music or voice recordings? Easy. CapCut lets you import audio files from your phone, cloud, or computer—no extra apps needed.
- Syncing with Video: Drag audio directly under your video clip on the timeline. Line up a beat with an action, or add dramatic music to your intro. There’s a lot you can do here even as a total beginner.
One thing I really appreciate: CapCut music is licensed for social sharing, so you don’t have to worry about copyright on sources like TikTok or Instagram. That said, if you export for commercial projects, double-check the music license; CapCut is pretty upfront about what’s included.
Adding Text, Captions, and Animated Titles
Almost every trending video now has captions, and not just for accessibility—a lot of people watch with the sound off, so on-screen text can make or break your content.
- Text Tool: The “Text” button gives you choices: normal titles, animated fonts, and subtitles. Tap on a clip, add your message, then drag to where it appears on the timeline.
- Auto-Captions: CapCut’s speech recognition turns spoken words into text in seconds—great for voiceovers or interviews. The result is precise, and you can tweak the words or styles afterward.
- Text Animation: Make your text fly, bounce, flash, or fade using builtin presets. Adjust speed and color with simple sliders to get the effect you want.
- Text Styles: Plenty of font, color, outline, shadow, and fill choices. If you want to stand out and match your brand or vibe, CapCut makes this super simple.
Text can appear, disappear, or even move with objects in your footage, thanks to “tracking”—a fun extra for those wanting to add some next-level cool. For most, the basics are more than plenty.
Templates, Presets, and Smart Effects
CapCut’s templates are your shortcut to prolevel videos, especially when you’re not feeling creative. I use them a lot when making quick birthday clips, Instagram reels, or intro cards for longer projects—it saves time and sparks ideas.
- How Templates Work: Pick a template you like (there are tons: travel vlogs, meme edits, routines, review collages), drop in your own clips, and CapCut automatically applies the effects, transitions, and timing. You can customize everything after the fact.
- Preset Effects: CapCut groups effects by style: party, retro, cinematic, cute, glitch, and more. Previewing is one tap, and applying an effect to multiple clips is quick.
- Smart Effects & AI Tools: Face blur, auto color correct, and background remover are the big ones for new users—one tap and you get a fancy result. No tech skill needed.
These timesavers are perfect when you want your video to look like you spent hours editing it, but really only needed a few minutes.
Chroma Key & Green Screen Magic
This is where CapCut shines for ambitious beginners. Chroma Key means you can change the background behind your subject—a classic “green screen” movie effect that’s now totally within your reach.
I tried this with a plain green posterboard and a selfie. Here’s how it goes:
- Drag your footage into the timeline. Place the background you want underneath the main clip.
- Tap your main (green screen) clip and pick “Chroma Key” from the tools menu.
- Use the color selector to pick the background color (usually green, or whatever you have).
- Adjust intensity and edge blur with sliders for a clean result.
- Export, and now you—or whoever’s in your video—are dancing on a beach, or wherever your background leads!
It sounds fancy, but CapCut makes it accessible for total beginners. Try it—it’s super fun for both silly and serious videos. Experiment and let your creativity go wild.
Filters, Color Grading, and Adjusting Video Looks
Sometimes the quickest way to make a shaky phone video look slick is to add a filter or tweak the color. CapCut gives you:
- One-tap filters in lots of themes: vintage, VHS, cyberpunk, soft beauty, black & white, and more.
- Manual Adjustments for brightness, contrast, saturation, warmth, cool, sharpness—easy sliders so you don’t need to know tech terms.
- Color Grading Presets for that promovie feel. If you want your video to fit a certain mood, the right preset makes all the difference.
Changing filters or fine-tuning colors is always reversible, so you don’t have to worry about messing up your original clip.
Stickers, Overlays, and Creative Addons
CapCut’s inbuilt sticker packs and overlays are a blast, especially for making videos that aren’t too serious. Think party highlights, memes, or just adding fun energy for friends or followers.
- Emoji reactions, speech bubbles, AR objects, timers, badges, countdowns, and tons more.
- Animated stickers can move, shake, spin, and be timed to appear or vanish anytime in your video.
- Stickers and overlays are draganddrop, with resize and rotation options built right in. Super satisfying for on-the-fly creativity.
I’ve used text overlays and stickers to call out key info in explainer videos or as a punchline for meme clips. The creative options are pretty much unlimited—even for total beginners who don’t see themselves as “design people.” Give them a try and see what pops out.
Export Settings, Aspect Ratios, and Sharing Your Video
Getting your video out of CapCut and onto your favorite platform is honestly one of the best parts. There are no complicated export wizards or hidden fees. You get:
- One-tap export for the most common video sizes (1080p, 720p, and now 4K on some platforms). You can pick between high, medium, and lower quality depending on your needs.
- Aspect ratio presets for TikTok (9:16), Instagram feed (1:1), stories or Reels (9:16), and YouTube (16:9 landscape or short 9:16). That helps you avoid black bars or cut-off frames.
- Direct sharing with linked TikTok, Instagram, Facebook, and WhatsApp accounts. Post in seconds or save locally for later; the export process is smooth and fast.
CapCut is also smart about optimizing file size so your uploads don’t clog your device or blow past your data cap. Great for creators on the go.
CapCut’s Web Editor vs. Mobile App vs. Desktop Version
I use all three versions of CapCut, and each brings its own strengths to the table. Here’s what I think you’ll find helpful about each:
- Mobile App (iOS/Android): The fastest way to create and share a video right from your phone. Touch controls are smooth, and it’s perfect for quick edits or shooting directly into the project.
- Web Editor: Runs in your browser—no download needed. Great for Chromebook or shared computers, and the interface lines up closely to the app.
- Desktop Editor (Windows/Mac): The most powerful option. Bigger screen, more precise controls (like audio mixing and color grading), and support for larger files or longer videos. Worth downloading if you want to try out more complex projects and level up your editing adventure.
Files sync across platforms if you’re logged in, so you can start a project on your phone and finish it on your laptop, or vice versa. Flexibility is one of CapCut’s most userfriendly perks!
Tips for Total Beginners: Learning by Doing
My biggest advice for anyone new to CapCut—just play around. CapCut makes it really hard to “break” anything, and the interface encourages you to experiment freely. Here are some beginnerfriendly tips:
- Duplicate projects before you try something daring—then you can always go back if things don’t work out.
- Use “Undo” often. It fixes mistakes instantly and encourages you to try out different effects.
- Try a template first, then slowly customize it by swapping in your footage and switching up colors or stickers to make the edit your own.
- Refer to CapCut’s Help/FAQ. It’s built into the app and covers most questions with short guides and GIFs. Great resource if something puzzles you.
- Watch what others make. In-app and on YouTube, beginners often post quick howto videos and CapCut edits for inspiration and tricks you might not think of on your own.
You’ll probably be surprised by what you can do after just an hour’s worth of playing around. Video editing doesn’t have to be complicated or intimidating, especially with tools like CapCut at your fingertips.
CapCut for Social Media: TikTok, Insta, YouTube, and Beyond
CapCut is seriously popular with social media creators because it ties into TikTok directly and keeps up with all the latest meme trends. But it’s also versatile if you want to create:
- YouTube Short or Full Video: Crop to 16:9 or 9:16, add animated titles and end cards, split and join footage, and make your content stand out.
- Instagram Reels and Stories: Use CapCut’s portrait templates, add text stickers, and export ready to post—one less headache for those who want quick results.
- Business or School Projects: Tools for overlaying graphs, voiceover, or putting together a clean photo slideshow with animated text make it great for students and professionals alike.
- Personal Sharing: Creative edits for birthdays, weddings, vacation recaps, or just funny moments with friends and family are simple and fun. CapCut is good at making videos feel authentic and personal.
CapCut also lets you add YouTubestyle intros, subscribe prompts, and outros—a helpful touch many free editors skip or make clunky. This keeps your brand or personal style intact across projects.
Troubleshooting & Common Beginner Problems in CapCut
Every app has some sticking points, but here are the ones I see most often with CapCut newbies:
- App Crashing or Freezing: Close other background apps to give CapCut more memory, or try restarting your device. Keeping CapCut updated helps avoid most issues.
- Watermarks: CapCut places a watermark on some premade templates or advanced effects. Most basic edits don’t have watermarks, and you can often remove the CapCut end card with one tap.
- Export Errors: If your export fails, check your available storage. Long videos or high-res clips can stress some phones or computers—try shortening your project or exporting at lower resolution as a workaround.
- Audio-Video Sync Issues: This can happen if you import large video files from outside apps. CapCut usually stays synced on native recordings. If not, try trimming, muting, and then readding the audio track while editing.
Most problems are fixable, and with a little patience, total beginners can sort things out. The CapCut online help center and YouTube community are really active, which helped me out more than once. Don’t be afraid to drop a question in the forums!
CapCut Community and Online Learning Resources
One of my favorite parts about CapCut is how big and supportive the community is. If you’re ever stuck or want a creative boost, there’s usually a video, post, or tutorial for you:
- In-app tutorials: Quick, interactive guides built right into the app—great for learning basics or tracking down new features you might have missed.
- YouTube creators & TikTok guides: Search CapCut and your question. You’ll almost always stumble upon a short, clear answer. A lot of creators upload “CapCut hacks” or “Top beginner tips.”
- Reddit and creative forums: Perfect for asking questions, sharing your work, or just lurking to get new ideas from what others are making.
- Official CapCut Help & Blog: Visit CapCut Blog for regular updates, tips, and project ideas to help you learn new tricks every week.
I’ve personally picked up a ton just by watching a few TikTok CapCut edits in action. People share their project files and editing recipes, which makes getting new skills hands-on and practical.
CapCut Free vs. Pro: Do You Need to Pay?
I get this question a lot. The answer: Most beginners don’t need to pay for anything in CapCut. The free version gets you almost every tool you’ll ever want, and there’s no forced watermark on your exports unless you use a paid template or a premium filter.
- CapCut Pro (sometimes also called CapCut Plus) is for folks who want special effects, more storage, or business-level features. Upgrading is optional, and if you stick with the basics, you’ll rarely hit a paywall.
- Purchasing individual assets: Some stickers, music tracks, and special effects are available to buy individually, but you don’t have to spend a dime unless you want something for a specific project.
Free CapCut is more generous than almost any other mobile or desktop editor I’ve tried. If you end up editing videos every week and want to unlock premium animations or extra cloud storage, you can go Pro later, but most people don’t need to pay as they’re getting started.
My Take: Who Should Use CapCut?
If you want to make polished, shareable videos—fast—CapCut is ideal. It’s especially good for:
- Absolute beginners learning to edit video for the first time
- Social media creators (TikTok, Reels, Shorts, YouTube, etc.)
- Students and teachers making class projects or fun group videos
- Small business owners creating simple promos, tutorials, or product demos
- Anyone who’d rather not struggle with complicated, expensive editing software
CapCut isn’t as advanced as heavyweight editors like Adobe Premiere or Final Cut. Those are often overkill for quick content and come with long learning curves and big price tags. For anything social, vlogs, slideshows, or basic YouTube videos, CapCut does the job really well—with minimal frustration.
CapCut Pricing: What’s Free and What’s Not?
CapCut is totally free for basic editing, and even a lot of the advanced stuff. Here’s a quick breakdown:
- Free Version: Download, edit, and export as much as you want. Nearly all effects, tools, and templates are included—no watermark except on specific pro features or templates.
- Paid Features: Premium stickers, templates, and animations can be purchased, and there’s a CapCut Pro/Plus subscription for unlimited cloud space, early access to pro effects, and ad removal.
As of 2024, the majority of users (myself included) stick with the free plan for months or even years before upgrading. The free tools cover everything a beginner would need. If you want to experiment with different animations or store lots of projects online, you can always try Pro down the line.
Final Thoughts: Start Editing with CapCut Today
Getting into video editing shouldn’t be stressful or expensive. CapCut is perfect for anyone who wants to jumpstart their creativity, with no steep learning curve or upfront cost. You can try every tool riskfree, and there’s a whole community of creators sharing tips and inspiration every day. You’ll be surprised how quickly your first video can go from idea to something you want to share.
If you’re ready to try out CapCut, just grab the free app or head to the web editor on your computer. No registration is required for most features, so you can begin right away.
Any questions or want to show off your project? There’s a welcoming CapCut creator community online, and I’m always happy to suggest helpful resources if you drop a comment below. Happy editing!